

DIY RC Plane Hardware Guide Amazon Local Stores and Used Gear
A scratch-built RC plane can fly beautifully on parts from three very different places: a big online marketplace, the corner hardware store, and somebody’s dusty garage shelf. The trick is knowing which parts are safe to buy cheap, which ones deserve extra care, and when making the part yourself is half the fun.
That’s especially true if you’re building from plans, modifying a kit, or bringing an old airframe back to life. Hardware choices affect weight, balance, reliability, repairability, and how much money stays in the hobby budget. A $9 wheel set might be perfect for a foam park flyer. A bargain servo with vague specs might be a bad idea in a fast warbird. A used nitro engine can be a gem, or it can be a box of problems with a crankshaft.
This guide walks through the practical ways to source RC plane hardware, including Amazon, local hardware stores, eBay, classifieds, and your own workbench. The goal isn’t to push one “right” way. It’s to help you build with confidence, save where it makes sense, and keep the old hands-on RC tradition alive.

Start with the airframe before you buy hardware
The easiest way to waste money is to buy hardware before the plane tells you what it needs.
A kit manual or set of plans usually gives you the basics: wingspan, target flying weight, recommended engine or motor size, servo count, wheel diameter, and center of gravity. If you’re scratch-building from your own design, you’ll need to estimate those numbers before ordering parts.
A few choices drive almost everything else.
Flying weight
More weight means a stronger landing gear, larger wheels, more wing loading, and usually more power. A lightweight park flyer can run tiny servos and foam wheels. A larger glow trainer needs stronger servo gears, a sturdier mount, real axles, and fuel-resistant finishes around the nose.
Power system
Electric setups need a motor, ESC, battery, connectors, prop adapter, and cooling airflow. Nitro or gas setups need a tank, fuel tubing, throttle linkage, engine mount, muffler clearance, and vibration control.
Field conditions
A paved runway allows smaller wheels and simple wire gear. Grass fields need larger wheels and more prop clearance. Rough farm fields call for more aluminum, thicker wire, and fewer delicate wheel pants.
Repair access
Scratch-built planes should be easy to fix. If a landing gear block, servo tray, or cowl mount takes three evenings to reach, future you won’t be happy.
Before you add anything to a cart, sketch the installation. Where will the servo arms move? Where will the pushrods exit? Can the battery slide forward or back to set the balance? Will the landing gear bolts be reachable after covering?
That little planning session can prevent a lot of “almost fits” hardware.
Buying RC plane hardware from Amazon works best when you know the limits
Amazon is convenient. No mystery there. It’s often the fastest way to get wheels, control horns, pushrods, adhesives, small tools, heat-shrink tubing, wire, connectors, inexpensive servos, and electric power parts.
For a scratch-built or kit-built model, that convenience matters. If you’re stopped because you need 3 mm wheel collars or a pack of clevises, fast shipping can keep the project moving.
But Amazon is a mixed bag for RC parts. Some listings are excellent. Others are vague, duplicated, or sold under names that change over time. Photos can be reused across sellers. Specs can be incomplete. Reviews may come from buyers using the part for cars, boats, robotics, or crafts rather than airplanes.
Here’s where Amazon usually shines, and where it needs caution.
Good Amazon buys
Wheels for light and medium models
Landing gear sets for common foam and balsa sizes
Generic control hardware
Heat-shrink tubing, silicone wire, connectors, screws, and small tools
Common electric motors, ESCs, and prop adapters for sport models
Use caution with these parts
Primary flight servos for fast or valuable models
Radio transmitters and receivers from unfamiliar brands
Very cheap ESCs with vague current ratings
Motors with incomplete size, Kv, or wattage data
Anything that has to survive high vibration or high speed
Landing gear and wheels are common Amazon wins
Landing gear is one of the easier categories to source online. You’ll find aluminum main gear, carbon-fiber-style gear, wire gear, nose gear struts, tailwheels, and foam or rubber wheels in many sizes.
For wheels, check three things:
Diameter
Axle hole size
Tread width
A 2.5-inch wheel may look right in the photo, but the axle hole might not match your wire or bolt. You can drill some hubs larger, but you can’t make a sloppy hole smaller without bushings.
For grass fields, bigger wheels help. They reduce nose-overs and let the plane roll instead of plowing. On electric planes, bigger wheels also help protect the prop during takeoff and landing.
For aluminum landing gear, look closely at width, height, thickness, and hole spacing. If the listing doesn’t show those dimensions, assume you may need to drill new holes or modify the mounting plate. That’s normal in scratch building, but it’s better to know before the package arrives.
Electric motors and ESCs need more than star ratings
Electric motors on Amazon are fine for many sport models, especially if they come from brands with consistent documentation. The key is matching the system, not just buying a motor that “looks about right.”
You’ll want to know:
Motor size or stator size
Kv rating
Recommended prop range
Battery cell count
Maximum current
Mounting pattern
Shaft diameter
The ESC must safely handle the current drawn by the prop and battery combination. If a motor pulls near the ESC’s limit on the ground, it can overheat in the air, especially inside a tight cowl. Good airflow matters.
A wattmeter is one of the best tools an electric RC builder can own. It sits between the battery and ESC and shows current, voltage, and power under load. That gives you real information instead of guessing from a listing.
For example, two props with the same diameter but different pitch can draw very different current. A motor that runs cool on one prop can cook itself on another.
Servos are cheap until they cost an airplane
Amazon is full of micro servos, standard servos, metal-gear servos, waterproof servos, and high-torque servos. Some work well. Some don’t center accurately, strip gears easily, or exaggerate torque specs.
A slow trainer can tolerate modest servos if the control surfaces are small and the linkages move freely. A fast model, large gas plane, or aerobatic aircraft deserves better gear.
Pay attention to:
Torque rating at the voltage you’ll actually use
Speed rating
Gear material
Bearing type
Connector type
Servo size and mounting tabs
Centering consistency
Don’t judge a servo only by torque. Poor centering can make a plane wander in pitch or roll even if the servo is strong enough. Sloppy output shafts also show up as flutter risk on larger control surfaces.
A simple bench test helps. Plug each servo into a receiver or servo tester, run it through its travel, listen for grinding, check centering, and gently load the horn with your fingers. If one servo behaves differently from the others, don’t bury it inside a wing.
Radio setups deserve the most caution
A radio system is not the place to gamble just to save a few dollars. The transmitter and receiver carry every command you give the plane. Range, signal reliability, failsafe settings, receiver quality, and support all matter.
Amazon sells name-brand radios, entry-level sets, and low-cost systems from lesser-known brands. Some are legitimate and useful. Others may have poor documentation or limited compatibility.
Before choosing a radio setup, check:
Receiver availability
Failsafe programming
Model memory
Channel count
Telemetry needs
Buddy box or trainer support
Manual quality
Community support
For a first serious build, buying from a known hobby retailer or a well-supported brand can be worth it. That doesn’t mean Amazon is always wrong. It just means radio gear should be chosen by track record, not by the lowest delivered price.
Local hardware stores are still one of the best RC suppliers
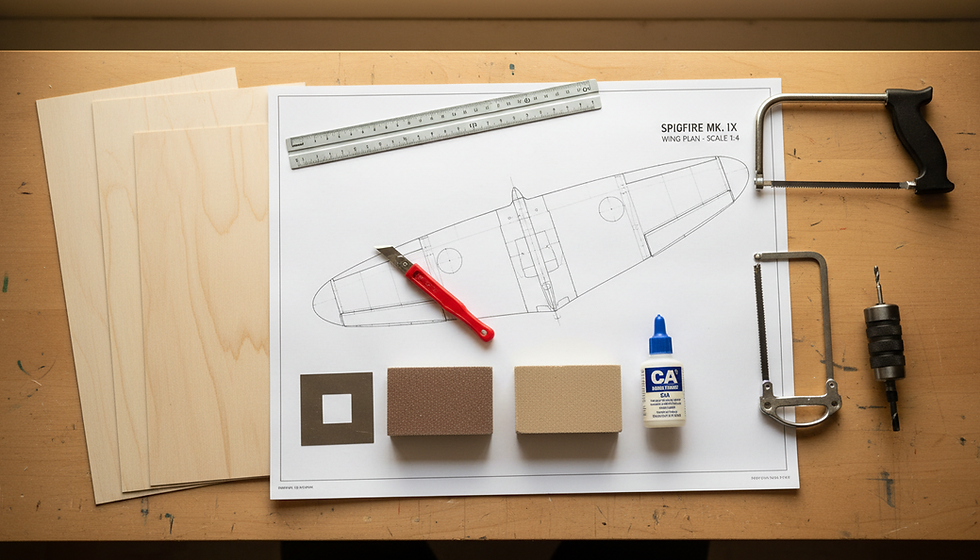
A local hardware store won’t have a package labeled “RC airplane landing gear,” but it may have exactly what you need: aluminum flat bar, aluminum sheet, brass tubing, music wire, threaded rod, nylon bolts, plywood, epoxy, small fasteners, sandpaper, drill bits, and cutting tools.
This is where the DIY side of the hobby gets real.
RC model aviation grew up around builders turning ordinary materials into flying machines. Long before one-click ordering, modelers bent landing gear from wire, carved balsa blocks into cowls, soldered brass tubes, and made control horns from plywood or phenolic sheet. That hands-on streak is still one of the best parts of scratch building.

Aluminum flat bar makes great landing gear
Many small and medium RC planes use aluminum flat bar for main landing gear. It’s light, springy enough for normal landings, and easy to cut and drill with basic tools.
The basic process looks like this:
Make a cardboard pattern from the plans or the airframe.
Mark the centerline, bend lines, axle holes, and mounting holes.
Cut the aluminum to length with a hacksaw, bandsaw, or cutoff wheel.
Smooth the edges with a file so cracks don’t start at sharp corners.
Clamp the blank in a vise and bend slowly along the marked lines.
Drill the axle and mounting holes.
Test fit the gear before final sanding or painting.
Aluminum work-hardens when bent repeatedly. In plain terms, bend it back and forth enough and it can crack. Try to get each bend right with steady pressure instead of working the same spot over and over.
A bend radius also helps. A sharp 90-degree crease is more likely to crack than a smooth bend. If you can bend around a piece of pipe, wood dowel, or rounded vise jaw, the gear will usually be happier.
Aluminum sheet is useful for brackets, hatches, and reinforcements
Thin aluminum sheet can become battery hold-down plates, servo mounts, cowl tabs, hatch latches, muffler shields, and reinforcement plates. It’s easy to cut with aviation snips or a fine-tooth saw, then shape with files.
For electric models, aluminum can also help around motor mounts and firewall areas, though it shouldn’t replace good plywood structure where the loads are high. For glow or gas models, aluminum shields can protect wood from exhaust oil and heat, as long as the engine still gets cooling air.
Just avoid creating sharp edges near wires, fuel tubing, or battery leads. A beautiful handmade bracket can ruin your day if it saws through insulation during vibration.
Rods, tubes, and threaded hardware solve linkage problems
Hardware stores often carry materials that work well for linkages and mounts:
Brass tubing for pushrod guides or bushings
Steel rod for control linkages
Threaded rod for adjustable pushrods
Nylon bolts for wing attachment
Small machine screws for servo hatches and access panels
Springs for tailwheel steering or hatch retention
One useful trick is nesting tubes. A smaller rod can slide inside a brass tube to make a clean guide or bearing surface. This comes up often in tailwheel assemblies, removable wing struts, and steerable nose gear.
For control systems, keep friction low and avoid flex. A pushrod that bows under load can make a control surface feel soft or delayed. If a long pushrod has to run through a fuselage, support it along the way with guide tubes or formers.
Used gear can stretch the budget, especially for nitro and gas
Used RC gear has always been part of the hobby. Swap meets, club tables, estate sales, hobby shop bulletin boards, eBay, and local classifieds can turn up great parts.
This matters even more for nitro and gas engines. Electric power has taken over many beginner and sport categories, but glow and gas engines still have a loyal following. They sound great, run for long flights with quick refueling, and fit many classic kits. Used engines are common because modelers change interests, downsize collections, or convert older planes to electric.
The upside is obvious: a used engine or radio accessory may cost far less than new. The downside is that condition varies widely.
What to check before buying a used nitro or gas engine
Photos matter, but they don’t tell the whole story. Ask specific questions and look for signs of care.
Good signs include:
Smooth crankshaft rotation
Strong compression for a glow engine
Clean carburetor movement
No broken cooling fins
No cracked mounting lugs
Muffler included
Original box or manual included
Seller can describe how it ran
Warning signs include rust, missing carb parts, stripped threads, damaged needle valves, heavy castor varnish, broken muffler bolts, and signs that the engine was stored open without a plug or cover.
A glow engine that feels “stuck” may just have old oil or castor residue inside, but it may also have corrosion. Don’t force it with pliers. Gentle heat, after-run oil, and patience are safer. If you’re not comfortable cleaning and inspecting engines, buy from someone who can demonstrate that it runs.
Gas engines add ignition modules, spark plugs, carb diaphragms, and fuel compatibility to the checklist. A used gas engine can be a great buy, but the ignition system should be included and undamaged. Replacement parts may or may not be easy to find depending on the brand and age.
eBay is good for selection, but read like a detective
eBay can be excellent for older engines, discontinued kits, vintage landing gear, mufflers, tanks, spinners, wheels, and radio accessories. It’s also where vague listings live forever.
Read every word of the listing. “Untested” usually means the seller won’t promise it works. “For parts” means exactly that. “Turns over” is not the same as “runs well.” If an engine is shown from only one side, ask for more photos.
For radio gear, be careful with old transmitters and receivers. Frequency rules, battery chemistry, old wiring, and outdated receiver technology can make vintage radios better for display than flying. In the U.S., most modern RC flying uses 2.4 GHz spread-spectrum systems, which greatly reduced the old problem of frequency conflicts at the field. If you buy old 72 MHz gear, make sure it’s legal, safe, and accepted at your flying site.
Servos can be worth buying used if they’re quality units and test well. Still, inspect the wires, check gear slop, and run them under load. A used throttle servo on a glow plane is lower risk than a used elevator servo on a fast model.
Local classifieds let you inspect before paying
Local classifieds, club forums, and community marketplaces give you one big advantage: you may be able to see the part in person.
That’s useful for:
Engines
Airframes
Large landing gear
Fuel tanks
Covering tools
Building supplies
Transmitters
Chargers
Starter boxes and field gear
A seller who flew at a local club may also know the history of the gear. That context has value. “This engine flew last season in a trainer” tells you more than a dozen blurry photos.
Bring a small checklist when meeting for used RC items. For engines, turn the crank, inspect mounting ears, check carb movement, and look inside the exhaust port if possible. For airframes, check glue joints, wing saddle cracks, firewall oil soaking, and hidden crash damage. For electronics, bring a receiver battery or servo tester when practical.
Use normal safety habits for local meetups. Meet in a public place when possible, don’t carry more cash than needed, and if a deal feels strange, skip it. There will always be more RC parts.

Fabricating canopies and cowls brings a model to life
Hardware isn’t only metal, screws, and electronics. Canopies and cowls are some of the most visible parts of a model, and making them yourself can transform a plain airframe into something that looks finished.
You have several options, from simple heat-formed plastic to fiberglass layups. PETG, polycarbonate, and epoxy resin each have a place.
PETG is friendly for homemade canopies
PETG is popular for clear canopies because it forms at manageable temperatures, stays clear, and is less brittle than some plastics. It’s used in many hobby and maker projects because it balances toughness and workability.
For a simple one-off canopy, you can make a plug from balsa, foam, plaster, or carved wood. Sand it smooth, seal it, and pull heated PETG over it. A small vacuum-forming box gives the cleanest results, but some builders use a frame and hand-form the material with heat.
The basic idea:
Shape the plug slightly smaller than the outside canopy size.
Smooth and seal the plug so it won’t print every scratch into the plastic.
Clamp PETG sheet in a simple wooden frame.
Warm it evenly until it sags slightly.
Pull it over the plug or let vacuum draw it down.
Trim the canopy with scissors or a rotary tool.
Test fit slowly, removing a little at a time.
A kitchen oven can heat plastic evenly, but don’t use food equipment casually without understanding fumes, residue, and household safety. Many builders use a dedicated toaster oven or heat source for shop work. Good ventilation matters.
A heat gun also works for small canopies and local adjustments. Keep it moving. If you stop in one spot, PETG can bubble, haze, or warp.
Polycarbonate is tough but harder to form
Polycarbonate is very impact resistant. That’s why it’s used in safety glasses, machine guards, and RC car bodies. For RC plane canopies, it can be great when durability matters.
The tradeoff is forming. Polycarbonate usually needs more heat than PETG, and it can absorb moisture from the air. If heated too fast when moisture is present, it may bubble. Commercial forming often dries polycarbonate before heating. In a home shop, that makes it less beginner-friendly.
Use polycarbonate when toughness matters more than easy forming. Use PETG when clarity, simplicity, and a smooth forming process matter most.
Cowls can be carved, heat-formed, or molded
A cowl has a harder life than a canopy. It handles vibration, heat, exhaust residue, airflow, and the occasional nose-over. The best material depends on the plane.
For electric models, a lightweight plastic cowl may be enough. For glow and gas models, fiberglass or epoxy composite cowls tend to hold up better.
Common cowl methods include:
Carved block cowl
Balsa or foam is shaped, sealed, painted, and mounted directly. This works well for simple noses and vintage designs. If using foam, make sure paints and resins won’t melt it.
Heat-formed plastic cowl
PETG or similar plastic can form over a plug, much like a canopy. This works for smooth, simple shapes. Clear plastic can be painted from the inside for a clean finish.
Fiberglass or epoxy cowl
A plug is shaped first, then fiberglass cloth and epoxy resin create the shell. Epoxy is commonly used in model building because it bonds well and shrinks less than some other resin systems. Polyester resin can attack certain foams, while epoxy is generally more foam-friendly, though you should still test materials first.
A simple fiberglass cowl process looks like this:
Build a plug from foam, balsa, or wood.
Sand it to the final shape.
Seal the surface so resin won’t stick permanently.
Apply mold release or packing tape for a one-off part.
Lay light fiberglass cloth over the plug.
Wet the cloth with epoxy resin.
Let it cure fully.
Trim the edges and cut cooling openings.
Sand, prime, and paint.
Wear gloves, protect your lungs from sanding dust, and work with ventilation. Epoxy is useful, but skin contact can cause sensitization over time. Dust from cured composites is also something you don’t want to breathe.
Build air exits into cowls, not just air inlets
A nice cowl can ruin an engine or ESC if it traps heat.
Cooling works when air enters, passes over the hot parts, and exits. The exit area often needs to be larger than the inlet area because air slows and expands after moving through the cowl. Modelers commonly open the bottom or rear of the cowl to create a low-pressure exit path.
For electric planes, aim airflow at the motor, ESC, and battery area. For nitro and gas planes, make sure air flows over the cylinder head and out of the cowl instead of just bouncing around inside.
Good cooling isn’t stylish, but dead-stick landings from overheated gear get old fast.
Match the source to the risk of the part
A helpful way to shop is to sort parts by risk. Some parts are annoying when they fail. Others can destroy a model.
Low-risk parts are good candidates for bargain hunting. High-risk parts deserve testing, known brands, or careful inspection.
Part type | Best sources | Buying advice |
Wheels | Amazon, hobby shops, swap meets | Match diameter, axle hole, width, and field surface. |
Landing gear | Amazon, local hardware stores, used airframes | Check dimensions, alloy thickness, and repair access. |
Servo screws and horns | Amazon, hobby shops | Make sure horns fit the servo spline. |
Electric motors | Amazon, hobby shops, classifieds | Match Kv, prop, battery, and current draw. Test with a wattmeter. |
ESCs | Hobby shops, trusted online sellers, Amazon with care | Leave current headroom and provide airflow. |
Servos | Hobby shops, Amazon with testing, used only if quality | Test centering, gear slop, and load before flight. |
Radio systems | Known hobby sources, trusted sellers | Prioritize support, failsafe, receiver availability, and range. |
Nitro engines | eBay, classifieds, swap meets | Inspect compression, bearings, carb, muffler, and mounting lugs. |
Gas engines | Classifieds, club sellers, specialty sellers | Check ignition, carb condition, parts availability, and vibration history. |
This doesn’t mean every Amazon servo is bad or every swap meet engine is good. It means the cost of failure should guide how much trust you require.
A tailwheel bracket can be replaced after a rough landing. A receiver failure can cost the whole plane. Treat them differently.
Build a small hardware inventory over time
Scratch builders tend to become collectors of useful little things. That’s not clutter if it saves a build session.
A few well-organized bins can hold:
Wheel collars
Nylon clevises
Ball links
Control horns
Servo extensions
Heat-shrink tubing
Fuel tubing
Blind nuts
Nylon bolts
Small hinges
CA hinges
Music wire
Brass tube
Plywood scraps
Aluminum offcuts
Label parts by size when you can. A drawer full of mystery screws wastes time. A drawer labeled `4-40 bolts`, `M3 hardware`, and `wheel collars` feels like a private hobby shop.
Keep old crashed airframes for parts too. Landing gear, pushrods, wheels, engine mounts, tanks, hatches, magnets, servos, and horns often survive. Many veteran builders have flown new aircraft using hardware rescued from models that met a less graceful end.
That practice has history behind it. Early RC modelers couldn’t always buy purpose-made parts, so they adapted. They used bicycle spokes, piano wire, plywood, dope, silkspan, hardwood blocks, and homemade connectors. The Academy of Model Aeronautics, founded in 1936, grew alongside that era of hands-on model aviation in the U.S. Building and problem-solving weren’t side activities. They were the hobby.

Test everything before it goes in the airplane
The best buying strategy still needs a testing habit. Parts should prove themselves on the bench before they fly.
For electric power systems, mount the motor securely and test with the intended prop, ESC, and battery. Use a wattmeter. Check current draw. Feel for heat after a short run. Make sure the prop adapter grips correctly and the motor mount screws don’t hit the windings.
For servos, cycle them. Let them move for a while. Check that they center the same way from both directions. Tug gently on the control surface after installation and look for flex. A linkage should feel smooth, not crunchy or springy.
For receivers, set failsafe before the first flight. Do a range check according to the radio manual. Don’t skip that step just because the system is new.
For used engines, run them on a test stand if possible. Tune the high and low needles, check transition, inspect for fuel leaks, and make sure the muffler stays tight. If the engine quits repeatedly on the stand, it won’t become more reliable in the air.
For handmade landing gear, drop-test gently by setting the airframe at landing height and watching how the gear flexes. Don’t abuse it. Just make sure the wheels track straight, the mount doesn’t twist, and the prop has clearance.
Keep safety close to the workbench
DIY doesn’t mean careless. Cutting, bending, drilling, heating plastic, and running engines all need basic safety habits.
Use eye protection when cutting wire, drilling metal, trimming fiberglass, or running motors. A spinning prop can hurt you before you can react, so remove the prop during radio setup and ESC programming whenever possible.
Wear a dust mask or respirator when sanding fiberglass, carbon, or cured resin. Use gloves with epoxy. Ventilate when heating plastics, painting, soldering, or running fuel engines.
Also think about fire safety. Lithium polymer batteries need proper charging practices and a safe storage routine. Fuel should be stored away from ignition sources. Oily rags and solvent-soaked towels don’t belong in a pile next to the bench.
None of this makes building less fun. It just keeps the hobby sustainable.
The best RC hardware source is usually a mix
If there’s a simple takeaway, it’s this: don’t shop by habit. Shop by part.
Amazon is great when you need common hardware fast, especially wheels, landing gear, connectors, wire, tools, and everyday supplies. Local hardware stores are perfect when you want raw material and the satisfaction of making something fit exactly. eBay and classifieds can unlock older engines, vintage parts, and budget-friendly gear, especially for nitro and gas projects. Your own bench can produce canopies, cowls, brackets, mounts, and fixes that no shopping cart can match.
That blend is the heart of scratch-built and kit-built RC flying. Buying smart matters, but building smart matters more. The old RC community was built by people who cut, bent, carved, soldered, sanded, tested, crashed, repaired, and tried again.
That spirit still works.
Start with the plans, choose the parts that matter, make what you can, test what you buy, and don’t be afraid of a few aluminum shavings on the floor. The airplane will feel more like yours when it lifts off.

Comments